Thursday, November 30, 2017

SETTING UP A SITE ROUTER IN REACT JS

SETTING UP A SITE ROUTER IN REACT JS
In this chapter, we will learn how to set up routing for an app.

Step 1 - Install a React Router

A simple way to install the react-router is to run the following code snippet in the command prompt window.
C:\Users\username\Desktop\reactApp>npm install react-router
Configure the .babelrc file in the root of the project as shown below-
C:\Users\username\Desktop\reactApp>\type nul>.babelrc
Add the following code in .babelrc file
{
  "presets": ["es2015", "react"]
}
Create a file as index.html in a root directory and the following code -
<!DOCTYPE html>
<html lang = "en">
   
   <head>
      <meta charset = "UTF-8">
      <title>React Router Tutorial</title>
   </head>
   
   <body>
      <div id = "app"></div>
      <script type = "text/javascript" src = "bundle.js"></script>
   </body>
   
</html>
To configure webpack.config.js file, add the following code in webpack.config.js
module.exports = {
   entry: './app/main.js',
   output: {
      filename: 'bundle.js'
   },
   module: {
      loaders: [
         {
            loader: 'babel-loader',
            test: /\.js$/,
            exclude: /node_modules/
         }
      ]
   },
   devServer: {
      port: 7777
   }
};

Step 2 - Add a Router

Now, we will add routes to the app. Instead of rendering Appelement like in the previous example, create a directory named as App and create files and named as main.js and App.js

main.js

import React, { Component } from 'react';
import { BrowserRouter as Router, Switch, Route, Link } from 'react-router-dom';
import Home from './Home';
import Login from './Login';

class App extends Component {
   render() {
      return (
         <Router>
            <div>
               <h2>Welcome to React Router Tutorial</h2>
               <ul>
                  <li><Link to={'/'}>Home</Link></li>
                  <li><Link to={'/Login'}>Login</Link></li>
               </ul>
               <hr />
               
               <Switch>
                  <Route exact path='/' component={Home} />
                  <Route exact path='/Login' component={Login} />
               </Switch>
            </div>
         </Router>
      );
   }
}
export default App;

App.js

import React from 'react';
import { render } from 'react-dom';
import App from './App';

render(<App />, document.getElementById('app'));

Step 3 - Create Components

In this step, we will create two components as (Home)and (Login) in App directory.

Home.js

import React, { Component } from 'react';

class Home extends Component {
   render() {
      return (
         <div>
            <h2>Home</h2>
         </div>
      );
   }
}
export default Home;

Login.js

import React, { Component } from 'react';
import ReactDOM from 'react-dom';

class Login extends Component {
   render() {
      return (
         <div>
            <h2>Login</h2>
         </div>
      );
   }
}
export default Login;
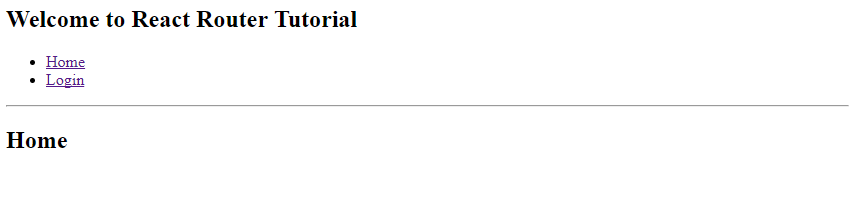
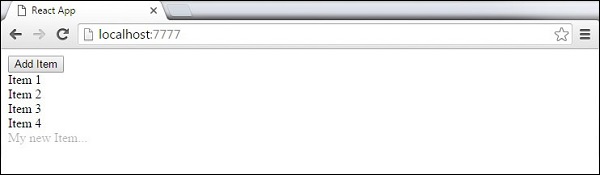
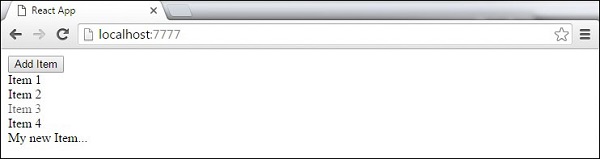
When the app is started, we will see two clickable links that can be used to change the route.
React Router Example

Continue reading

REACT FLUX CONCEPT

REACT FLUX CONCEPT
Image result for ReactJS - Environment SetupFlux is a programming concept, where the data is uni-directional. This data enters the app and flows through it in one direction until it is rendered on the screen.

Flux Elements

Following is a simple explanation of the flux concept. In the next chapter, we will learn how to implement this into the app.
  • Actions − Actions are sent to the dispatcher to trigger the data flow.
  • Dispatcher − This is a central hub of the app. All the data is dispatched and sent to the stores.
  • Store − Store is the place where the application state and logic are held. Every store is maintaining a particular state and it will update when needed.
  • View − The view will receive data from the store and re-render the app.
The data flow is depicted in the following image.
React Flux Concept Image

Flux Pros

  • Single directional data flow is easy to understand.
  • The app is easier to maintain.
  • The app parts are decoupled.
Continue reading

REACT JS .....USING FLUX PATTERNS

REACT JS .....USING FLUX PATTERNS
In this chapter, we will learn how to implement flux pattern in React applications. We will use Redux framework. The goal of this chapter is to present the simplest example of every piece needed for connecting Redux and React.

Step 1 - Install Redux

We will install Redux via the command prompt window.
C:\Users\username\Desktop\reactApp>npm install --save react-redux

Step 2 - Create Files and Folders

In this step, we will create folders and files for our actionsreducers, and components. After we are done with it, this is how the folder structure will look like.
React Redux Folder Structure

Step 3 - Actions

Actions are JavaScript objects that use type property to inform about the data that should be sent to the store. We are defining ADD_TODO action that will be used for adding new item to our list. The addTodo function is an action creator that returns our action and sets an id for every created item.

actions/actions.js

export const ADD_TODO = 'ADD_TODO'

let nextTodoId = 0;

export function addTodo(text) {
   return {
      type: ADD_TODO,
      id: nextTodoId++,
      text
   };
}

Step 4 - Reducers

While actions only trigger changes in the app, the reducersspecify those changes. We are using switch statement to search for a ADD_TODO action. The reducer is a function that takes two parameters (state and action) to calculate and return an updated state.
The first function will be used to create a new item, while the second one will push that item to the list. Towards the end, we are using combineReducers helper function where we can add any new reducers we might use in the future.

reducers/reducers.js

import { combineReducers } from 'redux'
import { ADD_TODO } from '../actions/actions'

function todo(state, action) {
   switch (action.type) {
      case ADD_TODO:
         return {
            id: action.id,
            text: action.text,
         }
      default:
         return state
   }
}
function todos(state = [], action) {
   switch (action.type) {
      case ADD_TODO:
         return [
            ...state,
            todo(undefined, action)
         ]
      default:
         return state
   }
}
const todoApp = combineReducers({
   todos
})
export default todoApp

Step 5 - Store

The store is a place that holds the app's state. It is very easy to create a store once you have reducers. We are passing store property to the provider element, which wraps our route component.

main.js

import React from 'react'

import { render } from 'react-dom'
import { createStore } from 'redux'
import { Provider } from 'react-redux'

import App from './App.jsx'
import todoApp from './reducers/reducers'

let store = createStore(todoApp)
let rootElement = document.getElementById('app')

render(
   <Provider store = {store}>
      <App />
   </Provider>,
 
   rootElement
)

Step 6 - Root Component

The App component is the root component of the app. Only the root component should be aware of a redux. The important part to notice is the connect function which is used for connecting our root component App to the store.
This function takes select function as an argument. Select function takes the state from the store and returns the props (visibleTodos) that we can use in our components.

App.js

import React, { Component } from 'react'
import { connect } from 'react-redux'
import { addTodo } from './actions/actions'

import AddTodo from './components/AddTodo.js'
import TodoList from './components/TodoList.js'

class App extends Component {
   render() {
      const { dispatch, visibleTodos } = this.props
      
      return (
         <div>
            <AddTodo onAddClick = {text ⇒dispatch(addTodo(text))} />
            <TodoList todos = {visibleTodos}/>
         </div>
      )
   }
}
function select(state) {
   return {
      visibleTodos: state.todos
   }
}
export default connect(select)(App);

Step 7 - Other Components

These components shouldn't be aware of redux.

components/AddTodo.js

import React, { Component, PropTypes } from 'react'

export default class AddTodo extends Component {
   render() {
      return (
         <div>
            <input type = 'text' ref = 'input' />
    
            <button onClick = {(e) ⇒ this.handleClick(e)}>
               Add
            </button>
         </div>
      )
   }
   handleClick(e) {
      const node = this.refs.input
      const text = node.value.trim()
      this.props.onAddClick(text)
      node.value = ''
   }
}

components/Todo.js

import React, { Component, PropTypes } from 'react'

export default class Todo extends Component {
   render() {
      return (
         <li>
            {this.props.text}
         </li>
      )
   }
}

components/TodoList.js

import React, { Component, PropTypes } from 'react'
import Todo from './Todo.js'

export default class TodoList extends Component {
   render() {
      return (
         <ul>
            {this.props.todos.map(todo ⇒
               <Todo
                  key = {todo.id}
                  {...todo}
               />
            )}
         </ul>
      )
   }
}
When we start the app, we will be able to add items to our list.
React Redux Example

Continue reading

REACT JS ANIMATIONS

REACT JS ANIMATIONS
In this chapter, we will learn how to animate elements using React.

Step 1 - Install React CSS Transitions Group

This is React add-on used for creating basic CSS transitions and animations. We will install it from the command promptwindow −
C:\Users\username\Desktop\reactApp>npm install react-addons-css-transition-group

Step 2 - Add a CSS file

Let's create a new folder css and file style.css inside. To be able to use it in the app, we need to link it to the head element in index.html.
<link rel = "stylesheet" type = "text/css" href = "css/style.css">

Step 3 - Appear Animation

We will create a basic React component. The ReactCSSTransitionGroup element will be used as a wrapper of the component we want to animate. It will use transitionAppear and transitionAppearTimeout, while transitionEnter and transitionLeave are false.

App.jsx

import React from 'react';
var ReactCSSTransitionGroup = require('react-addons-css-transition-group');

class App extends React.Component {
   render() {
      return (
         <div>
            <ReactCSSTransitionGroup transitionName = "example"
               transitionAppear = {true} transitionAppearTimeout = {500}
               transitionEnter = {false} transitionLeave = {false}>
     
               <h1>My Element...</h1>
            </ReactCSSTransitionGroup>
         </div>      
      );
   }
}
export default App;

main.js

import React from 'react'
import ReactDOM from 'react-dom';
import App from './App.jsx';

ReactDOM.render(<App />, document.getElementById('app'));
The CSS animation is very simple.

css/style.css

.example-appear {
   opacity: 0.01;
}
.example-appear.example-appear-active {
   opacity: 1;
   transition: opacity 500ms ease-in;
}
Once we start the app, the element will fade in.
React Animations Appear

Step 4 - Enter and Leave Animations

Enter and leave animations can be used when we want to add or remove elements from the list.

App.jsx

import React from 'react';
var ReactCSSTransitionGroup = require('react-addons-css-transition-group');

class App extends React.Component {
   constructor(props) {
      super(props);
  
      this.state = {
         items: ['Item 1...', 'Item 2...', 'Item 3...', 'Item 4...']
      }
      this.handleAdd = this.handleAdd.bind(this);
   };
   handleAdd() {
      var newItems = this.state.items.concat([prompt('Create New Item')]);
      this.setState({items: newItems});
   }
   handleRemove(i) {
      var newItems = this.state.items.slice();
      newItems.splice(i, 1);
      this.setState({items: newItems});
   }
   render() {
      var items = this.state.items.map(function(item, i) {
         return (
            <div key = {item} onClick = {this.handleRemove.bind(this, i)}>
               {item}
            </div>
         );
      }.bind(this));
      
      return (
         <div>      
            <button onClick = {this.handleAdd}>Add Item</button>
    
            <ReactCSSTransitionGroup transitionName = "example" 
               transitionEnterTimeout = {500} transitionLeaveTimeout = {500}>
               {items}
            </ReactCSSTransitionGroup>
         </div>
      );
   }
}
export default App;

main.js

import React from 'react'
import ReactDOM from 'react-dom';
import App from './App.jsx';

ReactDOM.render(<App />, document.getElementById('app'));

css/style.css

.example-enter {
   opacity: 0.01;
}
.example-enter.example-enter-active {
   opacity: 1;
   transition: opacity 500ms ease-in;
}
.example-leave {
   opacity: 1;
}
.example-leave.example-leave-active {
   opacity: 0.01;
   transition: opacity 500ms ease-in;
}
When we start the app and click the Add Item button, the prompt will appear.
React Animations Prompt
Once we enter the name and press OK, the new element will fade in.
React Animations Enter
Now we can delete some of the items (Item 3...) by clicking it. This item will fade out from the list.
React Animations Leave

Continue reading

REACT JS--- HIGHER ORDER COMPONENTS

REACT JS--- HIGHER ORDER COMPONENTS
Image result for higher order programing animateHigher order components are JavaScript functions used for adding additional functionalities to the existing component. These functions are pure, which means they are receiving data and returning values according to that data. If the data changes, higher order functions are re-run with different data input. If we want to update our returning component, we don't have to change the HOC. All we need to do is change the data that our function is using.
Higher Order Component (HOC) is wrapping around "normal" component and provide additional data input. It is actually a function that takes one component and returns another component that wraps the original one.
Let us take a look at a simple example to easily understand how this concept works. The MyHOC is a higher order function that is used only to pass data to MyComponent. This function takes MyComponent, enhances it with newData and returns the enhanced component that will be rendered on the screen.
import React from 'react';

var newData = {
   data: 'Data from HOC...',
}

var MyHOC = ComposedComponent  class extends React.Component {

   componentDidMount() {
      this.setState({
         data: newData.data
      });
   }

   render() {
      return <ComposedComponent {...this.props} {...this.state} />;
   }
};


class MyComponent extends React.Component {
   render() {
      return (
         <div>
            <h1>{this.props.data}</h1>
         </div>
      )
   }
}

export default MyHOC(MyComponent);
If we run the app, we will see that data is passed to MyComponent.
React HOC Output
Note − Higher order components can be used for different functionalities. These pure functions are the essence of functional programming. Once you are used to it, you will notice how your app is becoming easier to maintain or to upgrade.
Continue reading