Monday, March 12, 2018

ReactJS - Overview

ReactJS - Overview
Image result for overview programing animate
ReactJS is JavaScript library used for building reusable UI components. According to React official documentation, following is the definition −
React is a library for building composable user interfaces. It encourages the creation of reusable UI components, which present data that changes over time. Lots of people use React as the V in MVC. React abstracts away the DOM from you, offering a simpler programming model and better performance. React can also render on the server using Node, and it can power native apps using React Native. React implements one-way reactive data flow, which reduces the boilerplate and is easier to reason about than traditional data binding.

React Features


  • JSX − JSX is JavaScript syntax extension. It isn't necessary to use JSX in React development, but it is recommended.
  • Components − React is all about components. You need to think of everything as a component. This will help you maintain the code when working on larger scale projects.
  • Unidirectional data flow and Flux − React implements one-way data flow which makes it easy to reason about your app. Flux is a pattern that helps keeping your data unidirectional.
  • License − React is licensed under the Facebook Inc. Documentation is licensed under CC BY 4.0.

React Advantages

  • Uses virtual DOM which is a JavaScript object. This will improve apps performance, since JavaScript virtual DOM is faster than the regular DOM.
  • Can be used on client and server side as well as with other frameworks.
  • Component and data patterns improve readability, which helps to maintain larger apps.

React Limitations

  • Covers only the view layer of the app, hence you still need to choose other technologies to get a complete tooling set for development.
  • Uses inline templating and JSX, which might seem awkward to some developers.
Continue reading

ReactJS - Environment Setup

ReactJS - Environment Setup


Image result for ReactJS - Environment Setup

Image result for ReactJS - Environment Setup
In this chapter, we will show you how to set up an environment for successful React development. Notice that there are many steps involved but this will help speed up the development process later. We will need NodeJS, so if you don't have it installed, check the link from the following table.
Sr. No. Software & Description
1 NodeJS and NPM
NodeJS is the platform needed for the ReactJS development. Checkout our NodeJS Environment Setup.

Step 1 - Create the Root Folder

The root folder will be named reactApp and we will place it on Desktop. After the folder is created, we need to open it and create empty package.json file inside by running npm init from the command prompt and follow the instructions.
C:\Users\username\Desktop>mkdir reactApp
C:\Users\username\Desktop\reactApp>npm init

Step 2 - Install Global Packages

We will need to install several packages for this setup. We will need some of the babel plugins, so let's first install babel by running the following code in the command prompt window.
C:\Users\username\Desktop\reactApp>npm install -g babel
C:\Users\username\Desktop\reactApp>npm install -g babel-cli

Step 3 - Add Dependencies and Plugins

We will use webpack bundler in these tutorial. Let's install webpack and webpack-dev-server.
C:\Users\username\Desktop\reactApp>npm install webpack --save
C:\Users\username\Desktop\reactApp>npm install webpack-dev-server --save
Since we want to use React, we need to install it first. The --save command will add these packages to package.json file.
C:\Users\username\Desktop\reactApp>npm install react --save
C:\Users\username\Desktop\reactApp>npm install react-dom --save
As already mentioned, we will need some babel plugins, so let's install it too.
C:\Users\username\Desktop\reactApp>npm install babel-core
C:\Users\username\Desktop\reactApp>npm install babel-loader
C:\Users\username\Desktop\reactApp>npm install babel-preset-react
C:\Users\username\Desktop\reactApp>npm install babel-preset-es2015

Step 4 - Create the Files

Let's create several files that we need. It can be added manually or using the command prompt.
C:\Users\username\Desktop\reactApp>touch index.html
C:\Users\username\Desktop\reactApp>touch App.jsx
C:\Users\username\Desktop\reactApp>touch main.js
C:\Users\username\Desktop\reactApp>touch webpack.config.js
Alternative way to create files that we need
C:\Users\username\Desktop\reactApp>type nul >index.html
C:\Users\username\Desktop\reactApp>type nul >App.jsx
C:\Users\username\Desktop\reactApp>type nul >main.js
C:\Users\username\Desktop\reactApp>type nul >webpack.config.js

Step 5 - Set Compiler, Server and Loaders

Open webpack.config.js file and add the following code. We are setting webpack entry point to be main.js. Output path is the place where bundled app will be served. We are also setting the development server to 8080 port. You can choose any port you want.
And lastly, we are setting babel loaders to search for js files, and use es2015 and react presets that we installed before.

webpack.config.js

var config = {
   entry: './main.js',
   output: {
      path:'/',
      filename: 'index.js',
   },
   devServer: {
      inline: true,
      port: 8080
   },
   module: {
      loaders: [
         {
            test: /\.jsx?$/,
            exclude: /node_modules/,
            loader: 'babel-loader',
            query: {
               presets: ['es2015', 'react']
            }
         }
      ]
   }
}
module.exports = config;
Open the package.json and delete "test" "echo \"Error: no test specified\" && exit 1" inside "scripts" object. We are deleting this line since we will not do any testing in this tutorial. Let's add the start command instead.
"start": "webpack-dev-server --hot"
Before the above step, it will required webpack-dev-server. To install webpack-dev-server, use the following command.
C:\Users\username\Desktop\reactApp>npm install webpack-dev-server -g
Now, we can use npm start command to start the server. --hot command will add live reload after something is changed inside our files so we don't need to refresh the browser every time we change our code.

Step 6 - index.html

This is just regular HTML. We are setting div id = "app" as a root element for our app and adding index.js script, which is our bundled app file.
<!DOCTYPE html>
<html lang = "en">

   <head>
      <meta charset = "UTF-8">
      <title>React App</title>
   </head>

   <body>
      <div id = "app"></div>
      <script src = "index.js"></script>
   </body>

</html>

Step 7 - App.jsx and main.js

This is the first React component. We will explain React components in depth in a subsequent chapter. This component will render Hello World!!!.

App.jsx

import React from 'react';

class App extends React.Component {
   render() {
      return (
         <div>
            Hello World!!!
         </div>
      );
   }
}
export default App;
We need to import this component and render it to our root App element, so we can see it in the browser.

main.js

import React from 'react';
import ReactDOM from 'react-dom';
import App from './App.jsx';

ReactDOM.render(<App />, document.getElementById('app'));
Note − Whenever you want to use something, you need to import it first. If you want to make the component usable in other parts of the app, you need to export it after creation and import it in the file where you want to use it.

Step 8 - Running the Server

The setup is complete and we can start the server by running the following command.
C:\Users\username\Desktop\reactApp>npm start
It will show the port we need to open in the browser. In our case, it is http://localhost:8080/. After we open it, we will see the following output.
React Hello World
Continue reading

ReactJS - JSX

ReactJS - JSX

 Image result for ReactJS - JSX

Image result for ReactJS - Environment SetupReact uses JSX for templating instead of regular JavaScript. It is not necessary to use it, however, following are some pros that come with it.
  • It is faster because it performs optimization while compiling code to JavaScript.
  • It is also type-safe and most of the errors can be caught during compilation.
  • It makes it easier and faster to write templates, if you are familiar with HTML.

Using JSX

JSX looks like a regular HTML in most cases. We already used it in the Environment Setup chapter. Look at the code from App.jsx where we are returning div.

App.jsx

import React from 'react';

class App extends React.Component {
   render() {
      return (
         <div>
            Hello World!!!
         </div>
      );
   }
}
export default App;
Even though it's similar to HTML, there are a couple of things we need to keep in mind when working with JSX.

Nested Elements

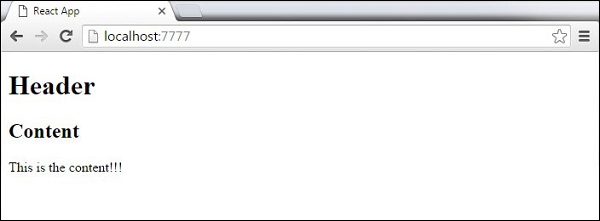
If we want to return more elements, we need to wrap it with one container element. Notice how we are using div as a wrapper for h1, h2 and p elements.

App.jsx

import React from 'react';

class App extends React.Component {
   render() {
      return (
         <div>
            <h1>Header</h1>
            <h2>Content</h2>
            <p>This is the content!!!</p>
         </div>
      );
   }
}
export default App;
React JSX Wrapper

Attributes

We can use our own custom attributes in addition to regular HTML properties and attributes. When we want to add custom attribute, we need to use data- prefix. In the following example, we added data-myattribute as an attribute of p element.
import React from 'react';

class App extends React.Component {
   render() {
      return (
         <div>
            <h1>Header</h1>
            <h2>Content</h2>
            <p data-myattribute = "somevalue">This is the content!!!</p>
         </div>
      );
   }
}
export default App;

JavaScript Expressions

JavaScript expressions can be used inside of JSX. We just need to wrap it with curly brackets {}. The following example will render 2.
import React from 'react';

class App extends React.Component {
   render() {
      return (
         <div>
            <h1>{1+1}</h1>
         </div>
      );
   }
}
export default App;
React JSX Inline Javascript We cannot use if else statements inside JSX, instead we can use conditional (ternary) expressions. In the following example, variable i equals to 1 so the browser will render true, If we change it to some other value, it will render false.
import React from 'react';

class App extends React.Component {
   render() {
      var i = 1;
      return (
         <div>
            <h1>{i == 1 ? 'True!' : 'False'}</h1>
         </div>
      );
   }
}
export default App;
React JSX Ternary Expression

Styling

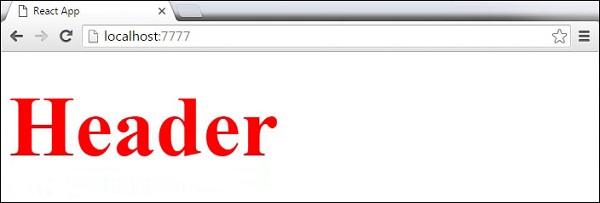
React recommends using inline styles. When we want to set inline styles, we need to use camelCase syntax. React will also automatically append px after the number value on specific elements. The following example shows how to add myStyle inline to h1 element.
import React from 'react';

class App extends React.Component {
   render() {
      var myStyle = {
         fontSize: 100,
         color: '#FF0000'
      }
      return (
         <div>
            <h1 style = {myStyle}>Header</h1>
         </div>
      );
   }
}
export default App;
React JSX Inline Style

Comments

When writing comments, we need to put curly brackets {} when we want to write comment within children section of a tag. It is a good practice to always use {} when writing comments, since we want to be consistent when writing the app.
import React from 'react';

class App extends React.Component {
   render() {
      return (
         <div>
            <h1>Header</h1>
            {//End of the line Comment...}
            {/*Multi line comment...*/}
         </div>
      );
   }
}
export default App;

Naming Convention

HTML tags always use lowercase tag names, while React components start with Uppercase.
Note − You should use className and htmlFor as XML attribute names instead of class and for.
This is explained on React official page as −
Since JSX is JavaScript, identifiers such as class and for are discouraged as XML attribute names. Instead, React DOM components expect DOM property names such as className and htmlFor, respectively.
Continue reading

ReactJS - Components

ReactJS - Components

Image result for ReactJS - Environment Setup Image result for ReactJS - Components

In this chapter, we will learn how to combine components to make the app easier to maintain. This approach allows to update and change your components without affecting the rest of the page.

Stateless Example

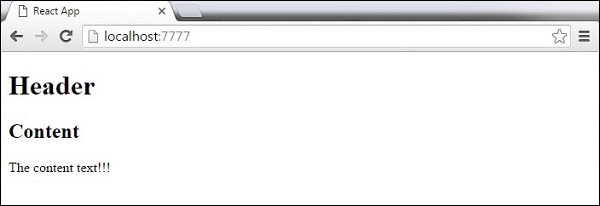
Our first component in the following example is App. This component is owner of Header and Content. We are creating Header and Content separately and just adding it inside JSX tree in our App component. Only App component needs to be exported.

App.jsx

import React from 'react';

class App extends React.Component {
   render() {
      return (
         <div>
            <Header/>
            <Content/>
         </div>
      );
   }
}
class Header extends React.Component {
   render() {
      return (
         <div>
            <h1>Header</h1>
         </div>
      );
   }
}
class Content extends React.Component {
   render() {
      return (
         <div>
            <h2>Content</h2>
            <p>The content text!!!</p>
         </div>
      );
   }
}
export default App;
To be able to render this on the page, we need to import it in main.js file and call reactDOM.render(). We already did this while setting the environment.

main.js

import React from 'react';
import ReactDOM from 'react-dom';
import App from './App.jsx';

ReactDOM.render(<App />, document.getElementById('app'));
The above code will generate the following result.
React Component Stateless

Stateful Example

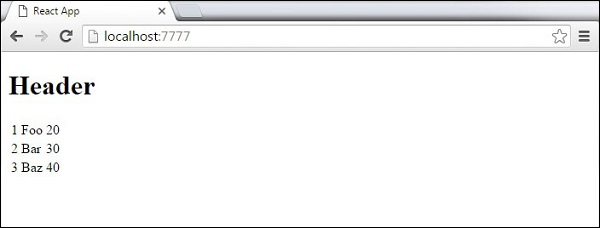
In this example, we will set the state for owner component (App). The Header component is just added like in the last example since it doesn't need any state. Instead of content tag, we are creating table and tbody elements, where we will dynamically insert TableRow for every object from the data array.
It can be seen that we are using EcmaScript 2015 arrow syntax () which looks much cleaner than the old JavaScript syntax. This will help us create our elements with fewer lines of code. It is especially useful when we need to create a list with a lot of items.

App.jsx

import React from 'react';

class App extends React.Component {
   constructor() {
      super();
      this.state = {
         data: 
         [
            {
               "id":1,
               "name":"Foo",
               "age":"20"
            },
            {
               "id":2,
               "name":"Bar",
               "age":"30"
            },
            {
               "id":3,
               "name":"Baz",
               "age":"40"
            }
         ]
      }
   }
   render() {
      return (
         <div>
            <Header/>
            <table>
               <tbody>
                  {this.state.data.map((person, i) => <TableRow key = {i} 
                     data = {person} />)}
               </tbody>
            </table>
         </div>
      );
   }
}
class Header extends React.Component {
   render() {
      return (
         <div>
            <h1>Header</h1>
         </div>
      );
   }
}
class TableRow extends React.Component {
   render() {
      return (
         <tr>
            <td>{this.props.data.id}</td>
            <td>{this.props.data.name}</td>
            <td>{this.props.data.age}</td>
         </tr>
      );
   }
}
export default App;

main.js

import React from 'react';
import ReactDOM from 'react-dom';
import App from './App.jsx';

ReactDOM.render(<App/>, document.getElementById('app'));
Note − Notice that we are using key = {i} inside map() function. This will help React to update only the necessary elements instead of re-rendering the entire list when something changes. It is a huge performance boost for larger number of dynamically created elements.
React Component Statefull
Continue reading