Friday, November 23, 2018

REACT NATIVE PROPS

REACT NATIVE PROPS
In our last chapter, we showed you how to use mutable state. In this chapter, we will show you how to combine the state and the props.
Image result for REACT NATIVE PROPS

Presentational components should get all data by passing props. Only container components should have state.

Container Component

We will now understand what a container component is and also how it works.

Theory

Now we will update our container component. This component will handle the state and pass the props to the presentational component.
Container component is only used for handling state. All functionality related to view(styling etc.) will be handled in the presentational component.

Example

If we want to use example from the last chapter we need to remove the Textelement from the render function since this element is used for presenting text to the users. This should be inside the presentational component.
Let us review the code in the example given below. We will import the PresentationalComponent and pass it to the render function.
After we import the PresentationalComponent and pass it to the render function, we need to pass the props. We will pass the props by adding myText = {this.state.myText} and deleteText = {this.deleteText} to <PresentationalComponent>. Now, we will be able to access this inside the presentational component.
App.js
import React from 'react';
import { StyleSheet, Text, View } from 'react-native';
import PresentationalComponent from './PresentationalComponent'

export default class App extends React.Component {
   state = {
      myState: 'Lorem ipsum dolor sit amet, consectetur adipisicing elit, used do eiusmod
      tempor incididunt ut labore et dolore magna aliqua. Ut enim ad minim veniam, quis
      nostrud exercitation ullamco laboris nisi ut aliquip ex ea commodo consequat. Duis
      aute irure dolor in reprehenderit in voluptate velit esse cillum dolore eu fugiat
      nulla pariatur. Excepteur sint occaecat cupidatat non proident, sunt in culpa qui
      officia deserunt mollit anim id est laborum.'
   }
   updateState = () => {
      this.setState({ myState: 'The state is updated' })
   }
   render() {
      return (
         <View>
            <PresentationalComponent myState = {this.state.myState} updateState = {this.updateState}/>
         </View>
      );
   }
}

Presentational Component

We will now understand what a presentational component is and also how it works.

Theory

Presentational components should be used only for presenting view to the users. These components do not have state. They receive all data and functions as props.
The best practice is to use as much presentational components as possible.

Example

As we mentioned in our previous chapter, we are using the EC6 function syntax for presentational components.
Our component will receive props, return view elements, present text using {props.myText} and call the {props.deleteText} function when a user clicks on the text.
PresentationalComponent.js
import React, { Component } from 'react'
import { Text, View } from 'react-native'

const PresentationalComponent = (props) => {
   return (
      <View>
         <Text onPress = {props.updateState}>
            {props.myState}
         </Text>
      </View>
   )
}
export default PresentationalComponent
Now, we have the same functionality as in our State chapter. The only difference is that we refactored our code to the container and the presentational component.
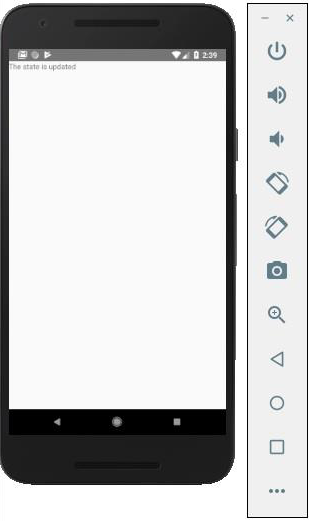
You can run the app and see the text as in the following screenshot.
React Native Props
If you click on text, it will be removed from the screen.
React Native Props updated

Continue reading

STYLING

STYLING
There are a couple of ways to style your elements in React Native.
You can use the style property to add the styles inline. However, this is not the best practice because it can be hard to read the code.
In this chapter, we will use the Stylesheet for styling.

Container Component

In this section, we will simplify our container component from our previous chapter.
App.js
import React from 'react';
import { StyleSheet, Text, View } from 'react-native';
import PresentationalComponent from './PresentationalComponent'

export default class App extends React.Component {
   state = {
      myState: 'This is my state'
   }
   render() {
      return (
         <View>
            <PresentationalComponent myState = {this.state.myState}/>
         </View>
      );
   }
}

Presentational Component

In the following example, we will import the StyleSheet. At the bottom of the file, we will create our stylesheet and assign it to the styles constant. Note that our styles are in camelCase and we do not use px or % for styling.
To apply styles to our text, we need to add style = {styles.myText}property to the Text element.
PresentationalComponent.js
import React, { Component } from 'react'
import { Text, View, StyleSheet } from 'react-native'

const PresentationalComponent = (props) => {
   return (
      <View>
         <Text style = {styles.myState}>
            {props.myState}
         </Text>
      </View>
   )
}
export default PresentationalComponent

const styles = StyleSheet.create ({
   myState: {
      marginTop: 20,
      textAlign: 'center',
      color: 'blue',
      fontWeight: 'bold',
      fontSize: 20
   }
})
When we run the app, we will receive the following output.
React Native Styling

Continue reading

FLEX BOX IN REACT NATIVE

FLEX BOX IN REACT NATIVE
Image result for FLEX BOX

To accommodate different screen sizes, React Native offers Flexbox support.
We will use the same code that we used in our React Native - Stylingchapter. We will only change the PresentationalComponent.

Layout

To achieve the desired layout, flexbox offers three main properties − flexDirection justifyContent and alignItems.
The following table shows the possible options.
PropertyValuesDescription
flexDirection'column', 'row'Used to specify if elements will be aligned vertically or horizontally.
justifyContent'center', 'flex-start', 'flex-end', 'space-around', 'space-between'Used to determine how should elements be distributed inside the container.
alignItems'center', 'flex-start', 'flex-end', 'stretched'Used to determine how should elements be distributed inside the container along the secondary axis (opposite of flexDirection)
If you want to align the items vertically and centralize them, then you can use the following code.
App.js
import React, { Component } from 'react'
import { View, StyleSheet } from 'react-native'

const Home = (props) => {
   return (
      <View style = {styles.container}>
         <View style = {styles.redbox} />
         <View style = {styles.bluebox} />
         <View style = {styles.blackbox} />
      </View>
   )
}

export default Home

const styles = StyleSheet.create ({
   container: {
      flexDirection: 'column',
      justifyContent: 'center',
      alignItems: 'center',
      backgroundColor: 'grey',
      height: 600
   },
   redbox: {
      width: 100,
      height: 100,
      backgroundColor: 'red'
   },
   bluebox: {
      width: 100,
      height: 100,
      backgroundColor: 'blue'
   },
   blackbox: {
      width: 100,
      height: 100,
      backgroundColor: 'black'
   },
})
Output
React Native Flexbox Center
If the items need to be moved to the right side and spaces need to be added between them, then we can use the following code.
App.js
import React, { Component } from 'react'
import { View, StyleSheet } from 'react-native'

const App = (props) => {
   return (
      <View style = {styles.container}>
         <View style = {styles.redbox} />
         <View style = {styles.bluebox} />
         <View style = {styles.blackbox} />
      </View>
   )
}

export default App

const styles = StyleSheet.create ({
   container: {
      flexDirection: 'column',
      justifyContent: 'space-between',
      alignItems: 'flex-end',
      backgroundColor: 'grey',
      height: 600
   },
   redbox: {
      width: 100,
      height: 100,
      backgroundColor: 'red'
   },
   bluebox: {
      width: 100,
      height: 100,
      backgroundColor: 'blue'
   },
   blackbox: {
      width: 100,
      height: 100,
      backgroundColor: 'black'
   },
})
React Native Flexbox Right

Continue reading

LIST VIEW

LIST VIEW

In this chapter, we will show you how to create a list in React Native. We will import List in our Home component and show it on screen.
App.js
import React from 'react'
import List from './List.js'

const App = () => {
   return (
      <List />
   )
}
export default App
To create a list, we will use the map() method. This will iterate over an array of items, and render each one.
List.js
import React, { Component } from 'react'
import { Text, View, TouchableOpacity, StyleSheet } from 'react-native'
   
class List extends Component {
   state = {
      names: [
         {
            id: 0,
            name: 'Ben',
         },
         {
            id: 1,
            name: 'Susan',
         },
         {
            id: 2,
            name: 'Robert',
         },
         {
            id: 3,
            name: 'Mary',
         }
      ]
   }
   alertItemName = (item) => {
      alert(item.name)
   }
   render() {
      return (
         <View>
            {
               this.state.names.map((item, index) => (
                  <TouchableOpacity
                     key = {item.id}
                     style = {styles.container}
                     onPress = {() => this.alertItemName(item)}>
                     <Text style = {styles.text}>
                        {item.name}
                     </Text>
                  </TouchableOpacity>
               ))
            }
         </View>
      )
   }
}
export default List

const styles = StyleSheet.create ({
   container: {
      padding: 10,
      marginTop: 3,
      backgroundColor: '#d9f9b1',
      alignItems: 'center',
   },
   text: {
      color: '#4f603c'
   }
})
When we run the app, we will see the list of names.
ListView
You can click on each item in the list to trigger an alert with the name.
React Native ListView

Continue reading